

API Co2 Booster Freshwater Aquarium Plant Treatment and API Stress Coat Aquarium Water Conditioner 16 oz Bottles Aquarium Bundle
Product details
| Management number | 217929280 | Release Date | 2026/05/03 | List Price | US$8.94 | Model Number | 217929280 | ||
|---|---|---|---|---|---|---|---|---|---|
| Category | |||||||||
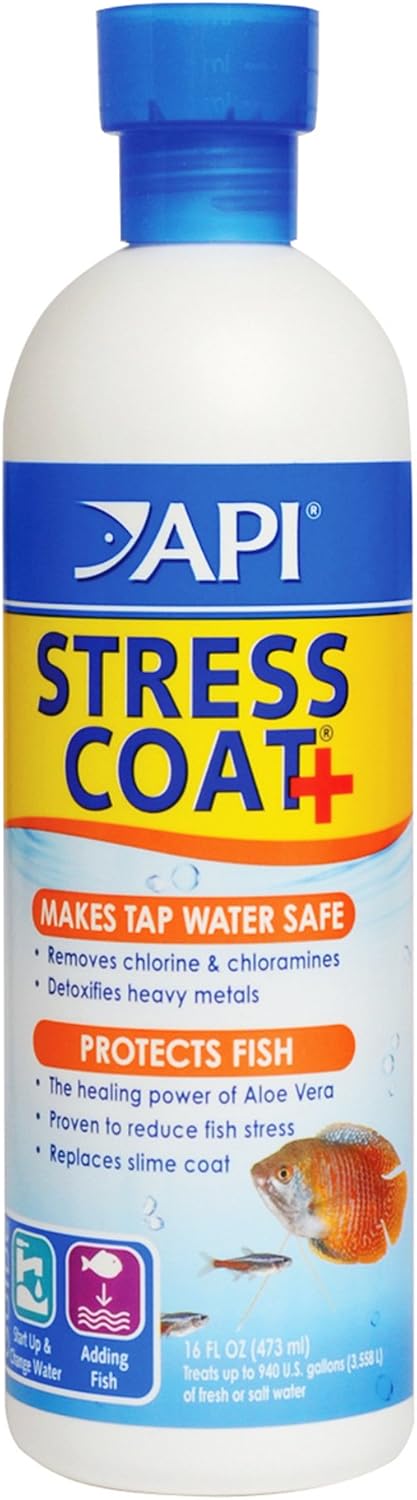
This aquarium plant and fish care bundle contains a 16 oz bottle of API CO2 Booster to promote vibrant, healthy plants and a 16 oz bottle of API Stress Coat to make tap water safe for fish. The API CO2 Booster supplies carbon that freshwater plants need for photosynthesis. It slowly releases carbon dioxide and organic carbon that plants can directly absorb from the water, whether used alone or with a separate CO2 system. The stress coat water conditioner removes chlorine, chloramines, ammonia, and heavy metals that are harmful to fish. Its proprietary formula with aloe vera extract replaces the protective mucus coating on fish that gets damaged from handling, shipping, or fighting. This has been scientifically proven to reduce fish stress by 40%. Together, these two treatments complement each other by creating ideal water conditions and nutrition for both plants and fish to thrive. The CO2 Booster fuels plant growth while the Stress Coat protects fish from tap water toxins, reduces stress, and aids healing of damaged tissue and fins.
- Contains API CO2 BOOSTER to promote vibrant, healthy aquarium plants by adding essential carbon that plants absorb from the water.
- Includes API STRESS COAT to make tap water safe for fish and heal damaged tissue with aloe vera.
- API CO2 BOOSTER is specially formulated liquid carbon to supply elements used by plants for photosynthesis.
- API STRESS COAT removes chlorine, chloramines, and heavy metals from tap water.
- Bundle includes one 16 oz bottle each of API CO2 BOOSTER and API STRESS COAT.
| Item Form | Liquid |
|---|---|
| Brand Name | API |
| Manufacturer | API |
| Liquid Volume | 473 Milliliters |
| Target Species | Fish |


Bestseller ranking
Dissection Instruments


Customers who viewed this product also viewed
Aquarium Water Treatments


Correction of product information
If you notice any omissions or errors in the product information on this page, please use the correction request form below.
Correction Request Form